First Time Installations
Getting Started
Before proceeding ensure that you have completed all Installation Prerequisites.
- Running the Installer – Only one user needs to run the installer. This process sets up SQL Server and provides the Excel add-in file.
- This user will also be responsible for installing future updates using the updater.exe program included in the installation.
- SQL Server Installation – The installer connects to your SQL Server and installs the necessary Tables, Views, and Stored Procedures used by TAD’s features.
- Managing TAD Licenses & Setups – Once installed, you can manage your TAD Licenses and Setups within the Vista User Database module.
Summary Steps
- Run the Installer – Install TAD and configure SQL connection settings.
- Give Form Security Access – Assign security permissions in VA Form Security.
- Assign TAD Licenses – Configure user access and security settings in TAD Admin - Licenses
Run the Installer
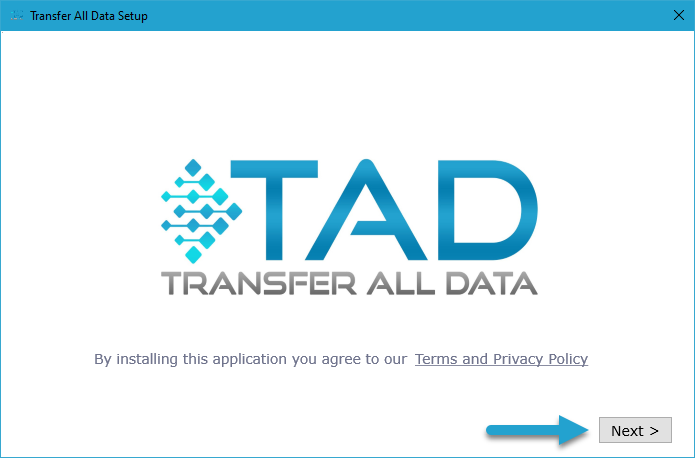
Double-click the Transfer All Data V#.##.exe file to start the installation.

Click the Next button to proceed.
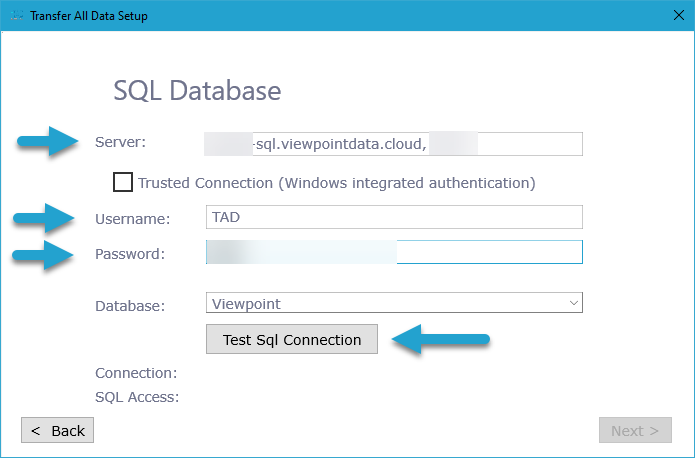
After clicking Next, the SQL Database screen appears.
- Enter the Server, Username, and Password.
- If you are using a Cloud server, enter your SQL Account credentials.
- Click the Test SQL Connection button to verify that your account has the correct permissions.
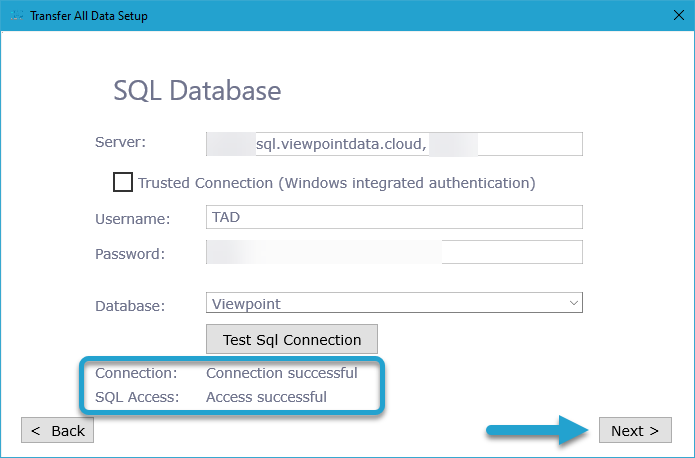
After clicking the Test SQL Connection button:
- If you receive an error, your Username does not have the correct permissions.
- If the error mentions the tadtTestSQLAccess table, it means the SQL Account has a permission issue.
- Ensure the account has the required access listed in the Installation Prerequisites.
- Verify that the VCSUsers permission is removed. This permission appears by default and overrides db_owner permissions.
- Otherwise, review the Installation Prerequisites to confirm the required permissions.
- If the connection is successful, click the Next button to proceed.
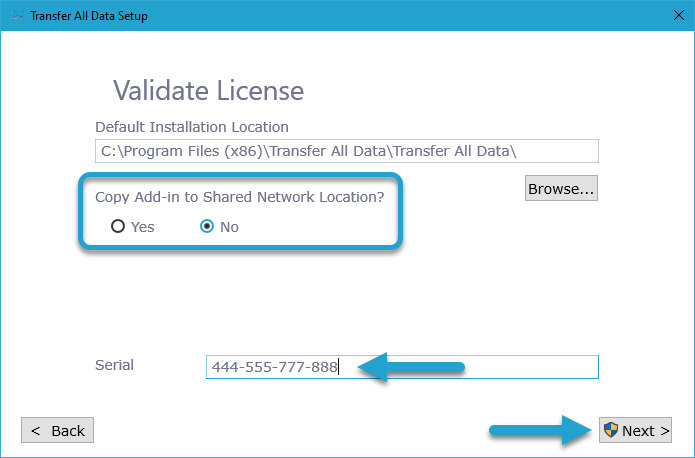
If you have multiple users, it is recommended to store the Excel add-in file in a shared network folder. This simplifies future updates, as you only need to replace a single file.
To enable this, select Yes for the Copy Add-in to Shared Network Location field.
Click the Browse button to choose the shared network location.
Serial NumberEnter the Serial Number found in the TAD Client Portal.
Click the Next button to proceed.
The installation typically takes between 15 and 120 seconds. Allow the process to run until it completes.
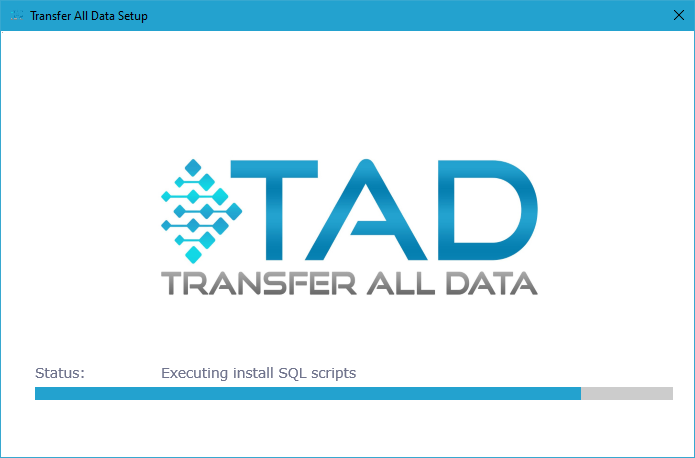
Once the installation is complete, click the Finish button.
You can view the installed files by navigating to the installation location. The default location is:
C:\Program Files (x86)\Transfer All Data\Transfer All Data
The \TAD Updater\ directory contains the TAD Updater, which is used for all future updates. The updater downloads the latest version from the TAD server and follows the same installation steps, including connecting to the server.

Give Form Security Access
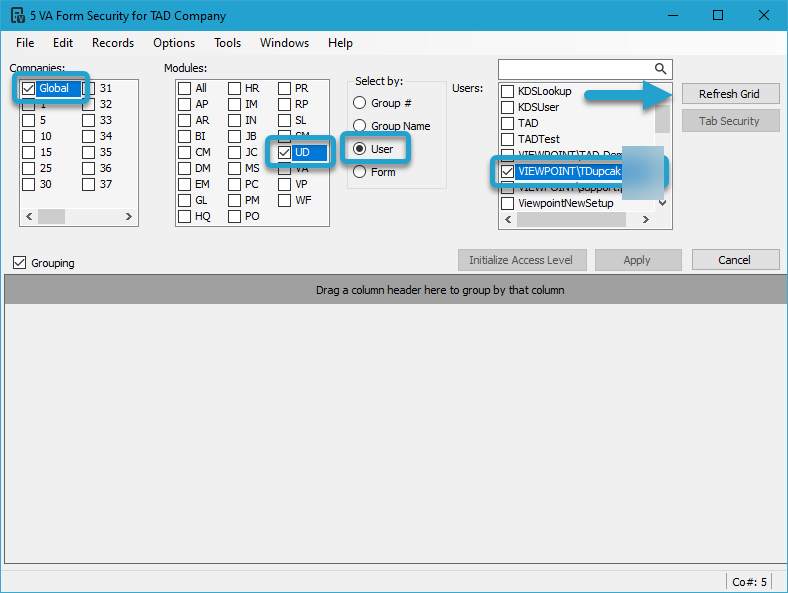
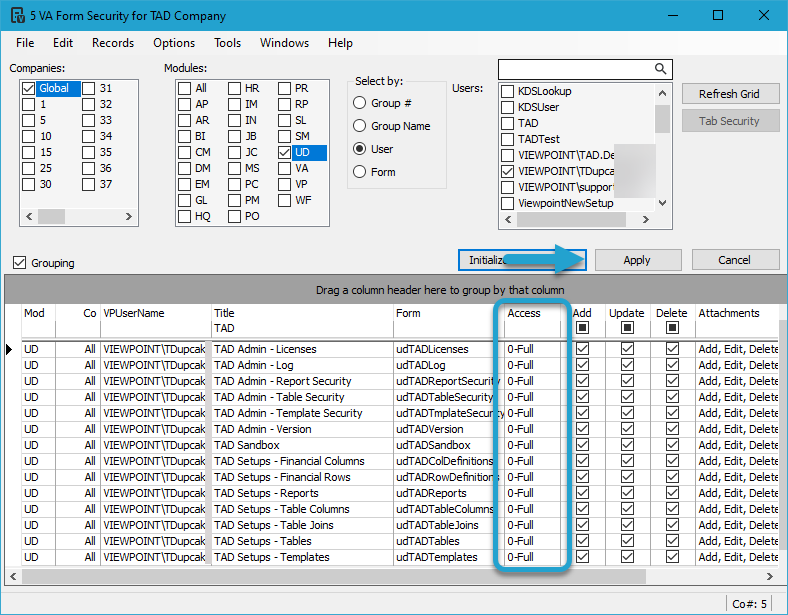
Sign into Vista and go to Viewpoint Administration → Programs → VA Form Security.
Check Global and the UD module.
Either select User and find your main Vista account, or select Group and find a group you are in.
Click the Refresh Grid button.
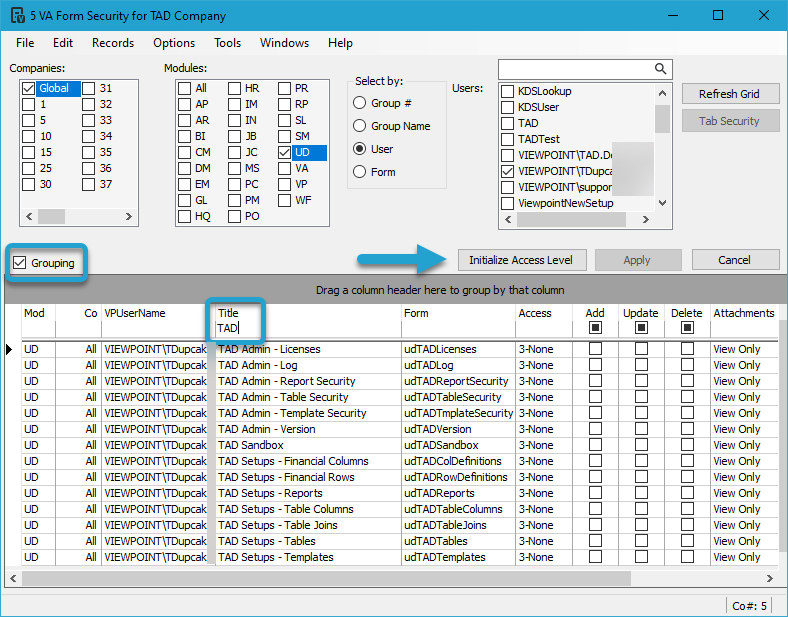
Check the Grouping checkbox and enter "TAD" in the Title column filter bar.
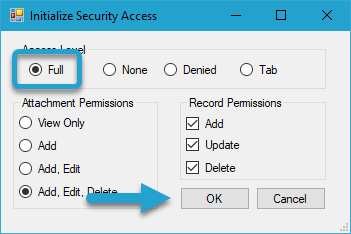
Click the Initialize Access Level button.
Select the Full option and click the OK button.
You should see 0-Full in the Access column for all filtered records.
Click the Apply button to save the changes and close the form.
Assigning TAD Licenses
On the Vista main menu, navigate to User Database → Programs, where you will see the TAD forms.
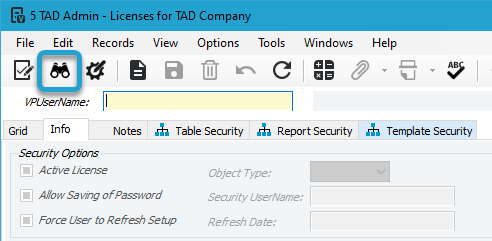
Open the TAD Admin - Licenses form.

Select the VPUserName field, then click the Binoculars button.
Find your SQL Account, then click the OK button.

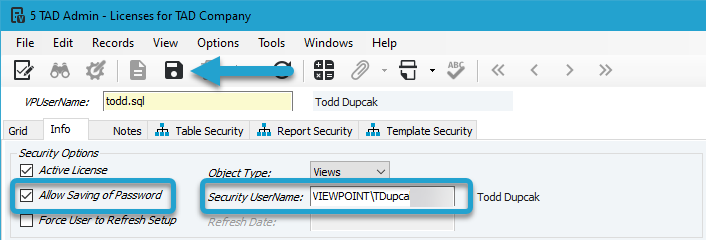
Check Allow Saving of Password if you want to enable password storage.
Select the Security UserName field, then click the Binoculars button to choose your main Vista account. The Vista security settings for this account will determine TAD security access.
Click the Save button to save the record.
On the right side, click the Generate All User Security button.
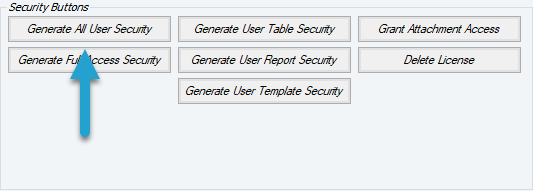
If you need access to all Tables, Reports, and Templates, regardless of your Vista access, you can click the Generate Full Access Security button.
This option should only be used in rare circumstances.

Repeat these steps for each additional TAD license.
You can now load the Excel Add-in and start using TAD!