Implementation Balance - PR Employee Accumulations
Getting Started
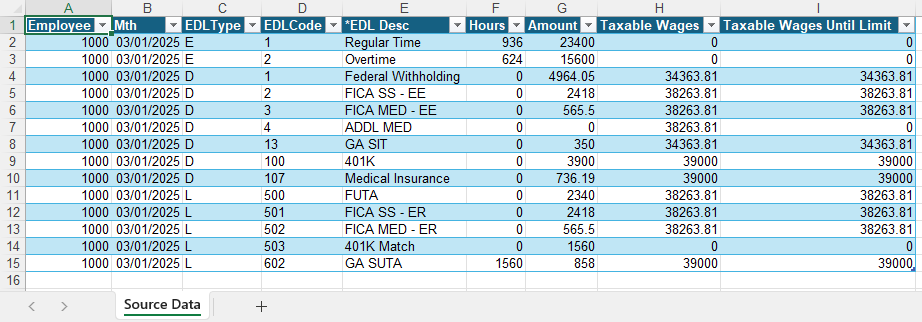
If you're doing a mid-year conversion you'll need to import Employee Accumulations to reflect all earnings, deductions, and liabilities recorded for each employee so far this year. This ensures accurate year-to-date reporting for payroll and tax purposes once you're live.
Template Info
-
Required Source Data
- Employee #
- Month
- Earning / Deduction / Liability Type
- Earning / Deduction / Liability Code
- Hours
- Amount
- Taxable Wages
- Taxable Wages Until Limit
-
Additional Tips
- If you're converting at the end of a quarter, the Month column above can reflect the quarter-end date.
- If you're converting in the middle of Q2–Q4 and need unemployment reporting from Vista, you’ll need to complete two separate data imports: one for the previous quarter-to-date values and another for the current quarter.
- For example, if you're converting in May, you would load Q1 accumulations as of March, and then load April/May either separately or combined into May.
-
Basic Steps
- Download TAD Template
- Copy the Source Data
- Verify Limits Not Exceeded
- Import the Records
- Validate Imported Data
Download TAD Template
Open your source data file in Excel.
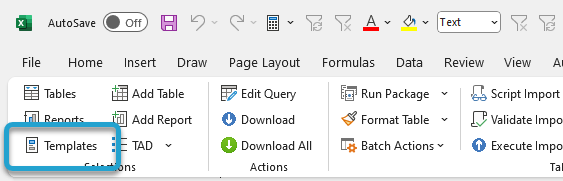
Click the Templates button on the left side of the ribbon.
If you've signed into TAD before, then you should receive the message below. Click Yes.
If you have not signed into TAD before, follow the Get Connected instructions.

Select the Implementation Balance – PR Employee Accums template.
Click the Download Selected button.
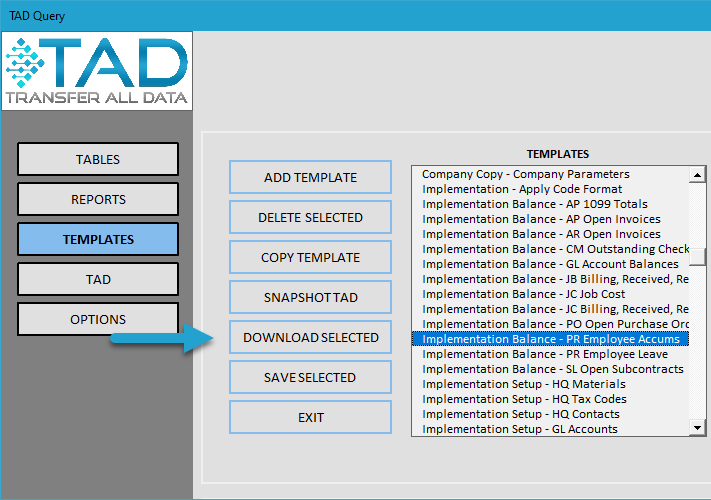
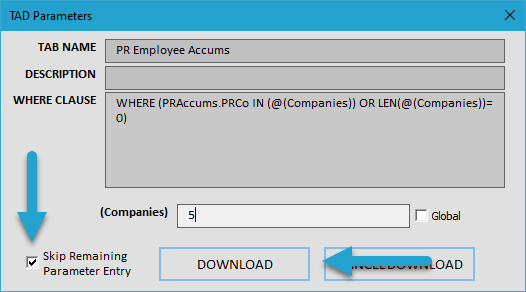
This template includes multiple tables, so make sure to check the Skip Remaining Parameter Entry box and click the Download button to download them all at once.
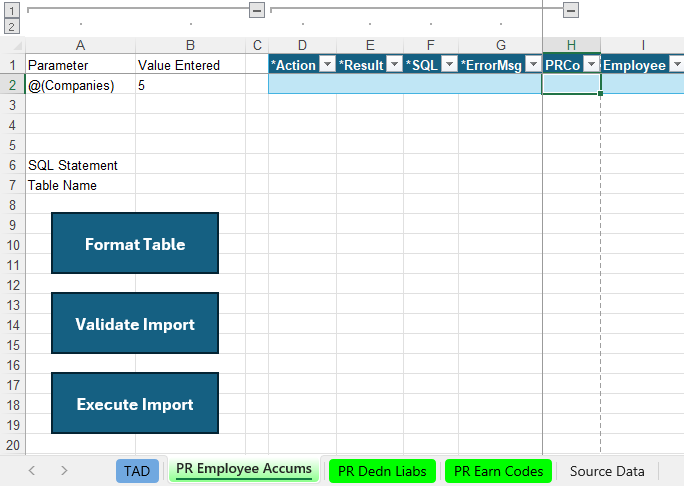
You’ll see multiple worksheets, as shown below.
The PR Employees Accums sheet is where you’ll import the accumulations.
The PR Dedn Liabs and PR Earn Codes worksheets are used to pull Limit and Description values.
Copy the Source Data
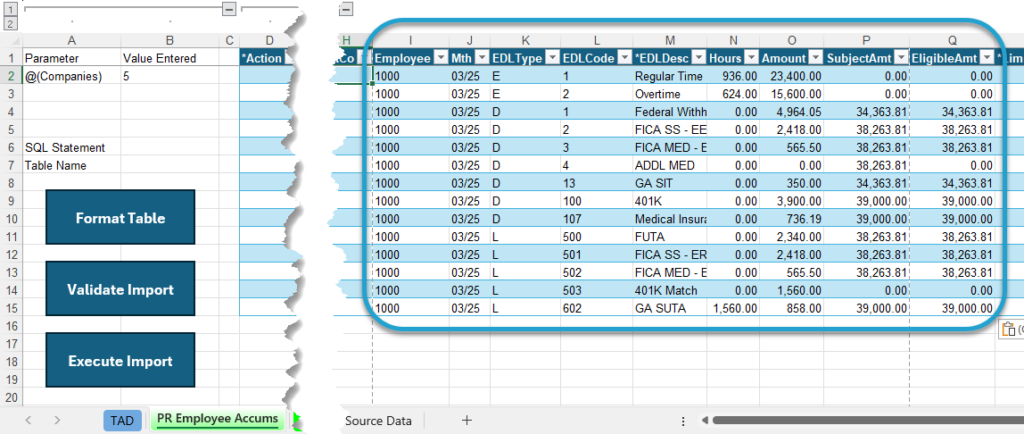
Copy and paste the source data into the PR Employee Accums sheet. If your source data layout matches the example above, this will be a single copy and paste since the PR Employee Accums columns are already in the same order.
Verify Limits Not Exceeded
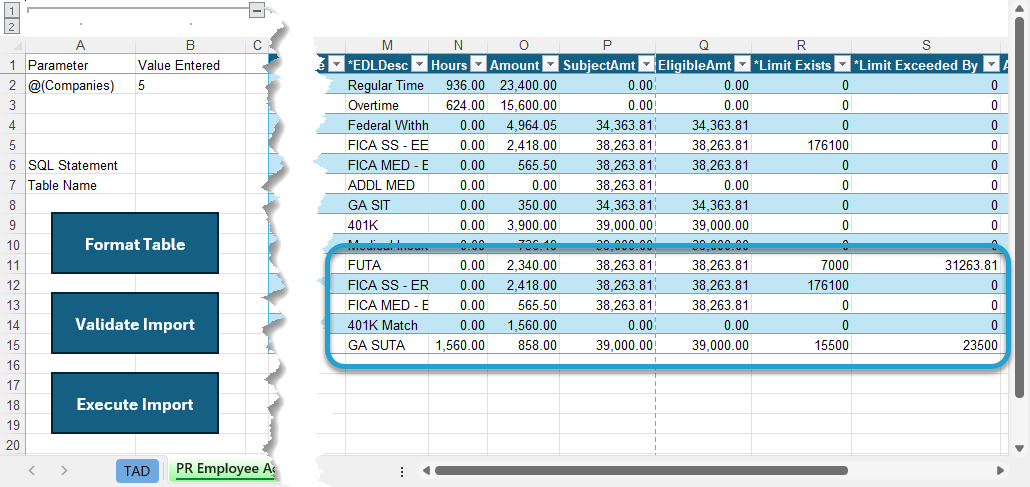
Before importing the records, it’s recommended to verify that limits have not been exceeded for any codes with set limits (e.g., SUTA, FICA SS). The TAD template includes two special columns—Limit Exists and Limit Exceeded By—which will display amounts if the YTD limits have been exceeded.
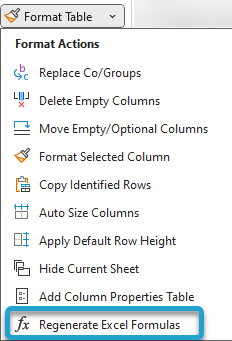
Click the submenu of the Format Table button on the ribbon and choose the Regenerate Excel Formulas button. This will apply XLOOKUP and other formulas to multiple columns pulling default values from the PR Dedn Liabs and PR Earn Codes worksheets.
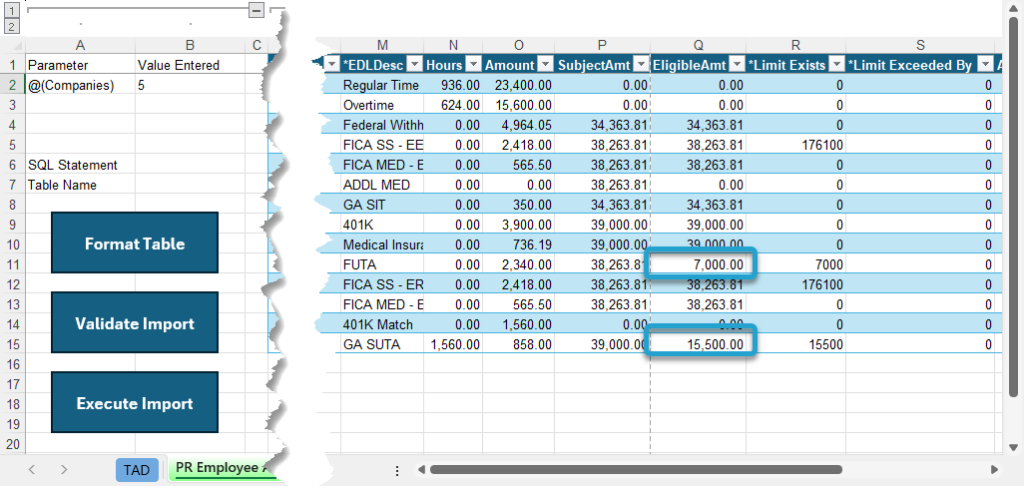
If you see any values in the Limit Exceeded By column, you’ll need to adjust Column Q (EligibleAmt). This column represents the amount of taxable wages up to the point where the limit has been reached.
Once the EligibleAmt values are updated, the Limit Exceeded By column will show 0.
Additional Medicare has special rules for how accumulations should be loaded. The SubjectAmt should reflect the total taxable wages to date, while the EligibleAmt should include only the wages exceeding the Additional Medicare threshold of $200,000.
For example, if an employee has been paid $210,000 YTD, the following values would apply:
- SubjectAmt: $210,000
- EligibleAmt: $10,000
- Amount: $10,000 × 0.009 = $90
Import the Records
Click the Format Table button to format the data you copied and to apply missing default values.
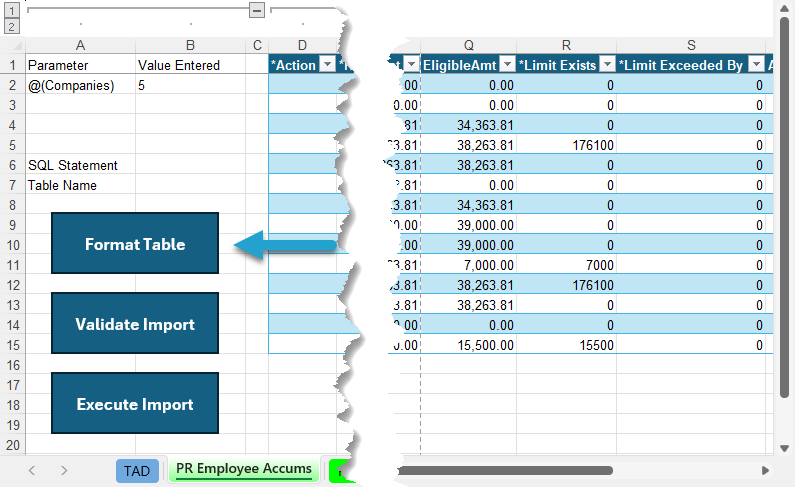
The Result column will show Formatted for every record. You will see the default Company number applied.
Click the Validate Import button.
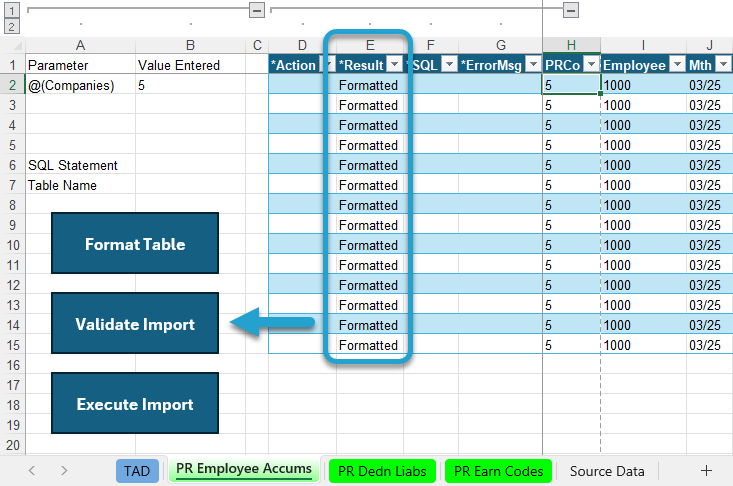
The Result column will show Validated for every record. If this says Failure, then the ErrorMsg column will provide the error.
Click the Execute Import button.
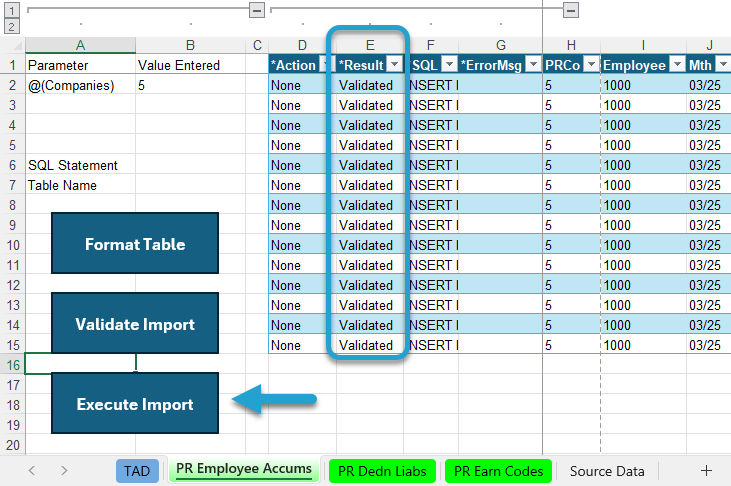
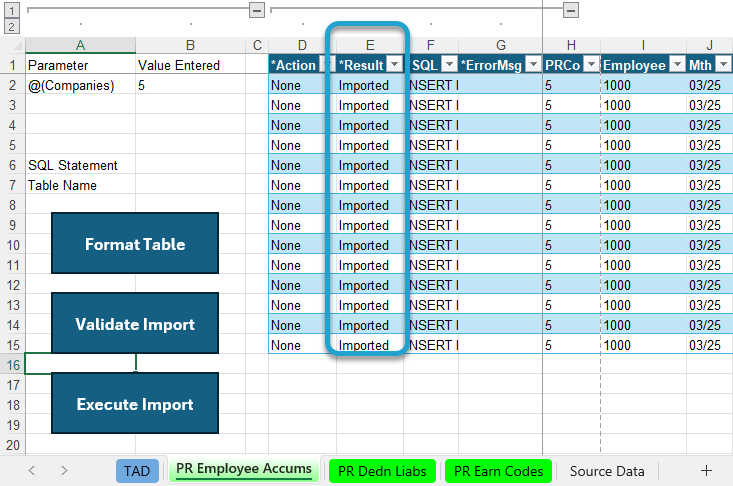
The Result column will show Imported for every record. You can now validate the data in Vista.
Validate Imported Data
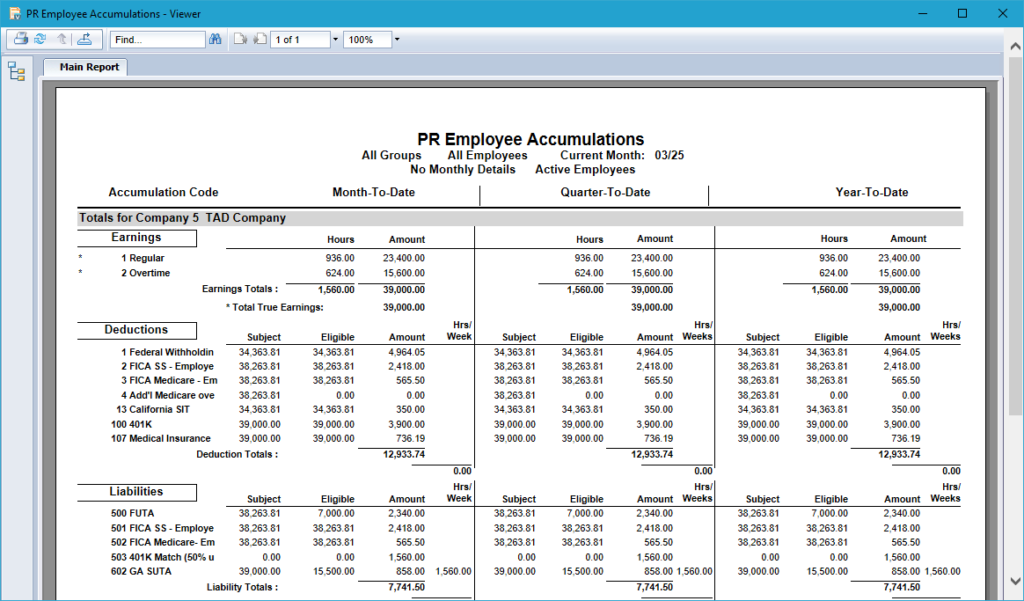
You can validate the Employee Accumulations by running the PR Employee Accumulations report in Vista.
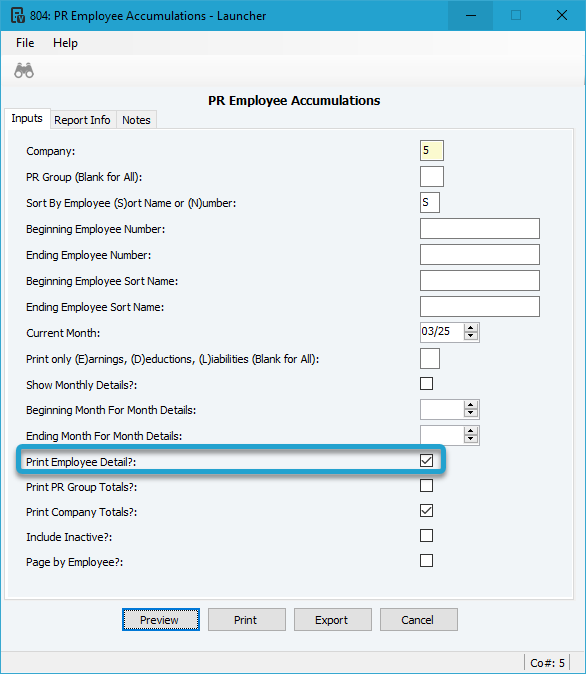
Enter your Company and the Current Month that you just imported.
You can uncheck Print Employee Detail to view only Company Totals if you prefer to validate the summary values first.
Make all other parameters look like the image below.
You can validate each Earning, Deduction, and Liability at the employee level.
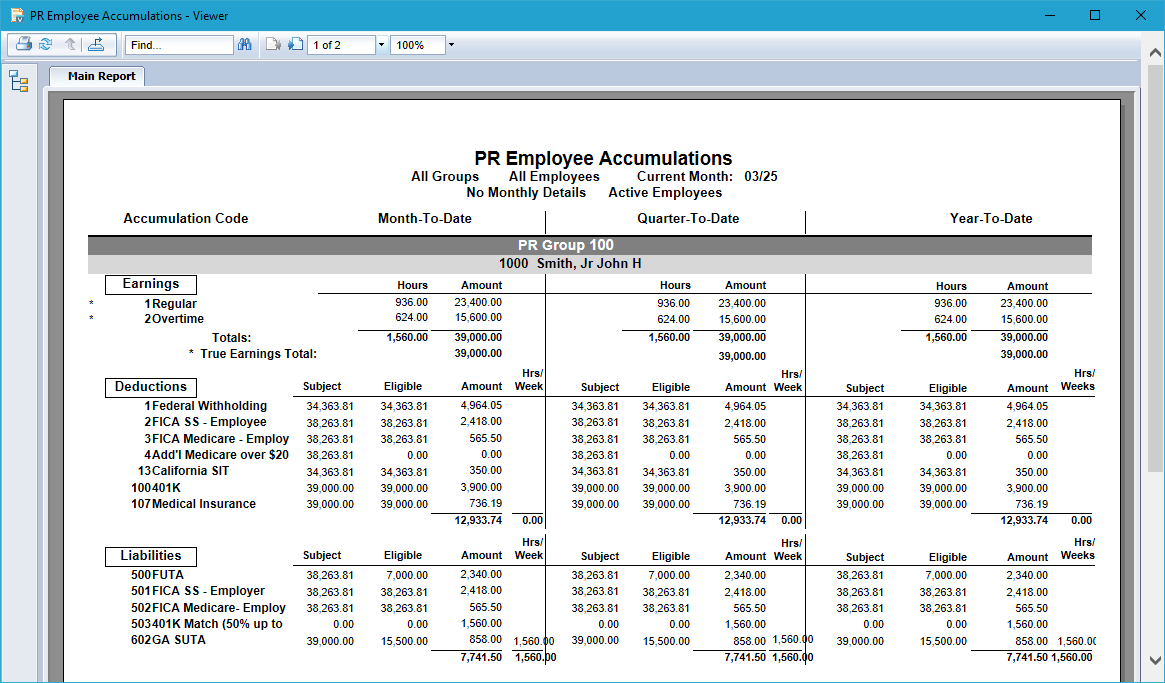
You can also validate the Company Totals.