Replacing the Excel Add-in
Getting Started
If you already have the Excel Add-in loaded and need to replace it with a newer version follow the steps below.
Single Licenses If you are using the Excel Add-in installed in C:\Program Files (x86)\Transfer All Data\Transfer All Data, then each upgrade automatically replaces the file, and no further action is needed.
Multiple Licenses If your company has multiple TAD licenses, it is recommended to store the Excel Add-in in a shared network folder. This simplifies future updates, as you only need to replace the shared file.
Other Locations If you are using a different location or are unsure where your Excel Add-in is stored, follow the steps below.
Where is my Add-in Located?
To find where your existing Excel Add-in is located, follow the steps below.
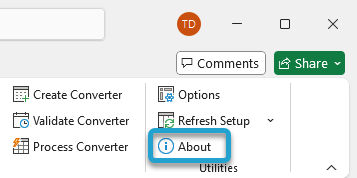
Click the About button on the right side of the TAD ribbon.
Click the Add-in Location link at the bottom.
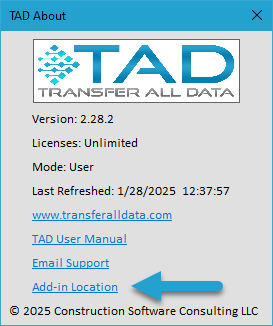
You will receive a message displaying the current location of the Excel Add-in.

If your message references \AppData\Roaming\Microsoft\Addins, it means you have a local copy stored in the default Excel Add-ins folder. This path can be accessed directly through Excel.
Skip to the Replace Local Copy steps below.
Otherwise, continue to the Replace the Excel Add-in File steps below.

Replace the Excel Add-in File
Now that you know the location of your current Excel Add-in, close all Excel workbooks.
Browse to the folder and replace the existing file with the updated version. You can copy and paste the updated Excel Add-in file from:
�CODE0�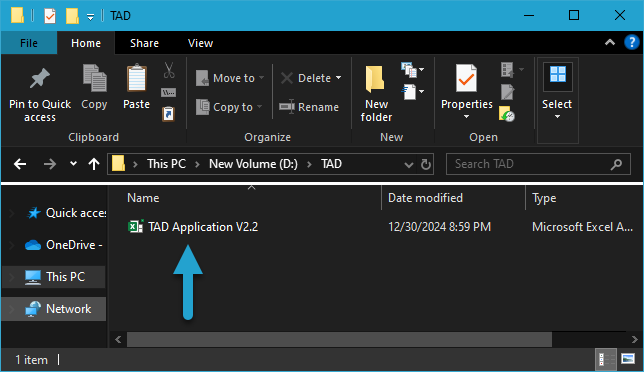
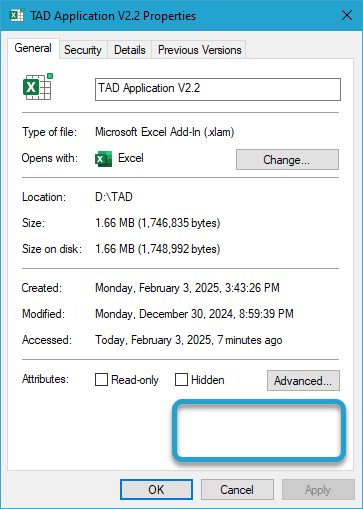
Right-click on the new file and select Properties.
If you see an Unblock checkbox, check it and click the OK button.
Open Excel, and it will load with the new Excel Add-in from that location.
Skip to the Verify New Add-in Loads steps below.
Replace Local Copy
If your Excel Add-in is located in the default Excel Add-ins folder, follow the steps below.
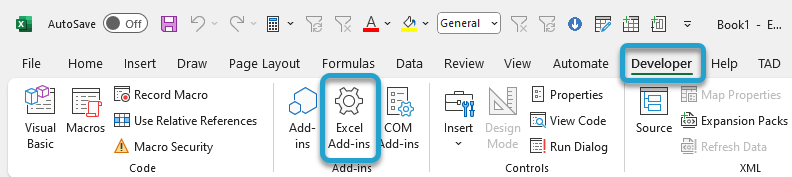
Select the Developer ribbon and click the Excel Add-ins button.
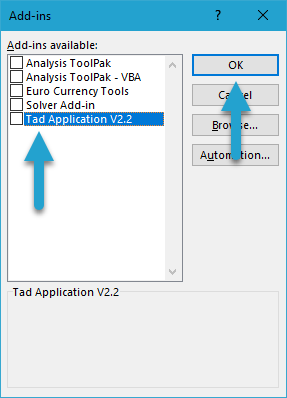
Uncheck the TAD Application option.
Click the OK button to deactivate the add-in.
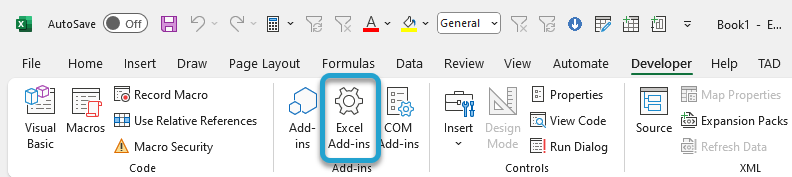
Click the Excel Add-ins button again.
Click the Browse button.
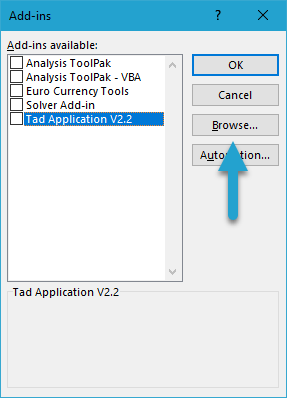
Copy and paste the new Excel Add-in into this folder, replacing the existing file. You can copy the updated Excel Add-in from:
�CODE1�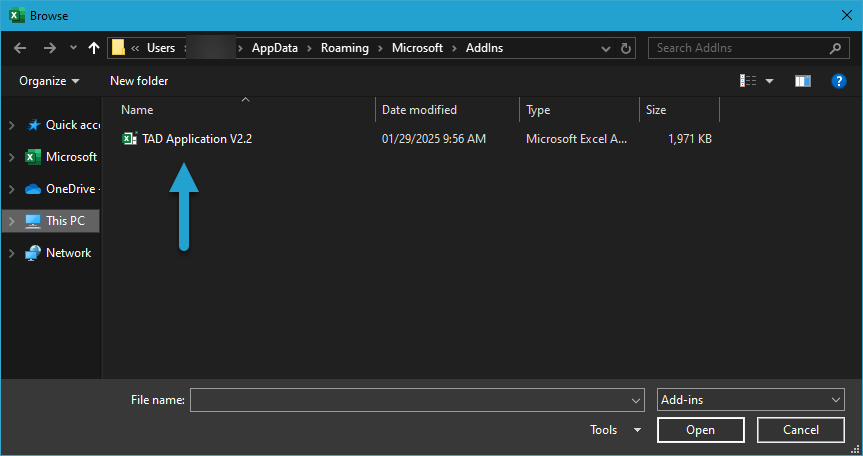
Right-click on the new file and select Properties.
If you see an Unblock checkbox, check it and click the OK button.
Select the Add-in file, then click the OK button.
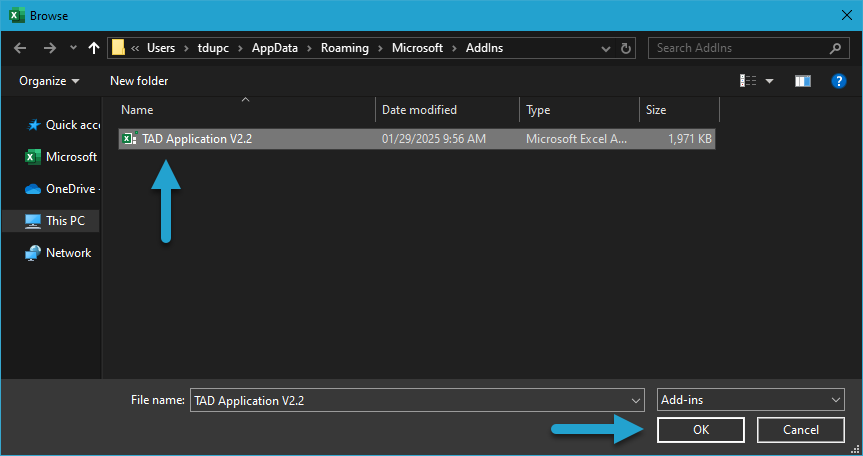
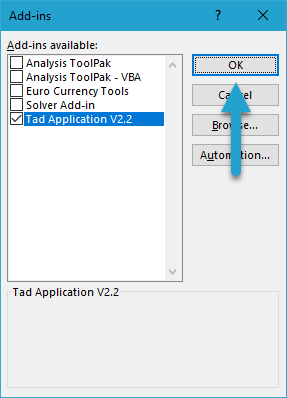
Click the Yes button if you receive a message about replacing the existing add-in.

Click the OK button to load the new Add-in file.
Trusted Location Needed?
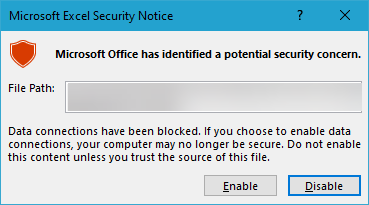
If you receive a security notice when opening a new workbook, you need to add a Trusted Location for the folder where the Excel Add-in is stored.
Microsoft has become more strict with macro-enabled files (e.g., Add-ins), so adding a Trusted Location is likely required.
Go to the Developer ribbon and click the Macro Security button.

Go to the Trusted Locations section and click the Add new location button.
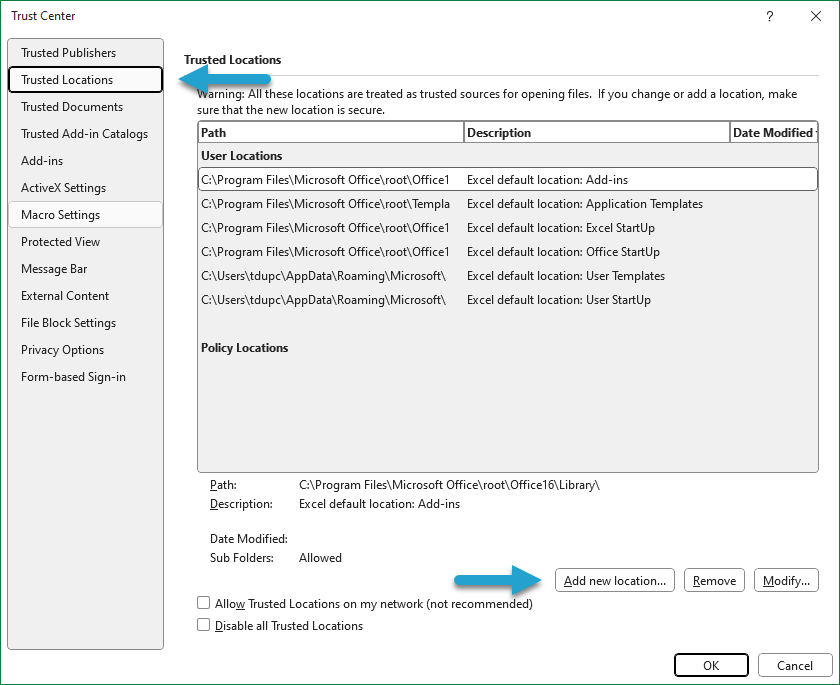
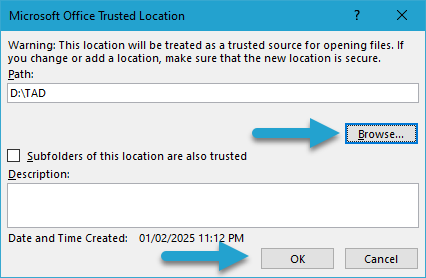
Click the Browse button, navigate to the folder containing your Excel Add-in, and then click the OK button.
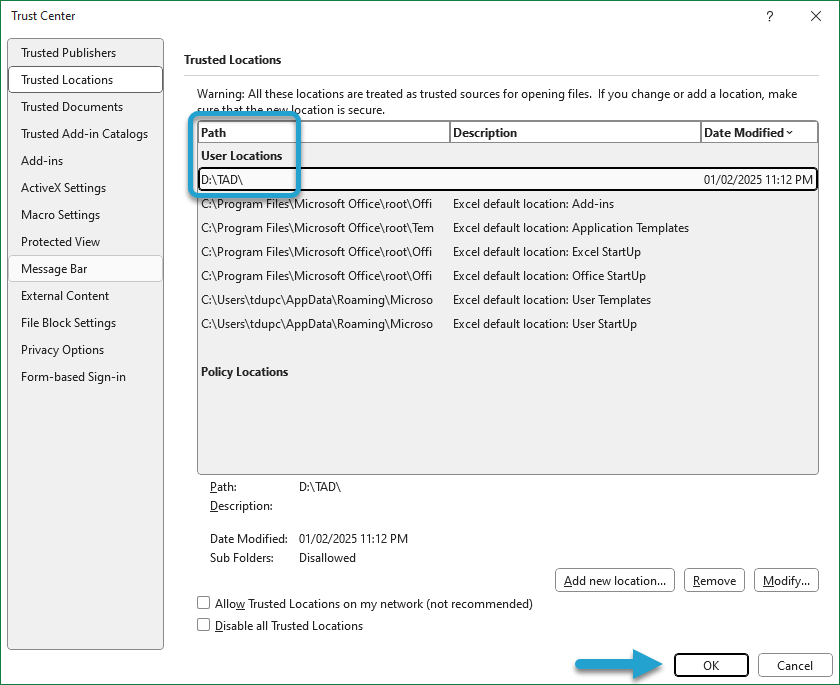
You should see your newly added Trusted Location in the list. Click the OK button to confirm and save the changes.
Close the workbook and open a new blank workbook. You should no longer see the security notice.