Getting Started with TEDI
This guide orients you to TEDI so you can install it, understand how it runs, and know where to go next for your first Vista automation.
What is TEDI?
TEDI (Total Enterprise Data Intelligence) is a local Windows application that runs guided Automations — pre-built step sequences that drive Vista for you, such as auto-posting AP batches, refreshing monthly closes, or processing folders of data. TEDI fills forms, posts batches, processes folders, and handles other repeatable Vista jobs—then keeps run history and optional proof packs on your machine.
TEDI is not a cloud automation platform. Playbook definitions, SQL catalog cache, schedules, run evidence, and history stay under C:\ProgramData\TEDI\. License validation uses tuds.ai.
TEDI runs completely standalone. A TUDS account is not required for TEDI to operate. TUDS is only needed if you want to retrieve your license key, manage licenses from a web dashboard, or view the knowledge base articles. License validation pings tuds.ai periodically and will disable schedules if the license is inactivated, but the product itself does not depend on a TUDS account.
How TEDI is built (important)
TEDI has two parts that work together:
- Desktop app (TEDI) — Activate the license, connect Vista SQL Server, launch or schedule automations, and monitor runs from Command Center.
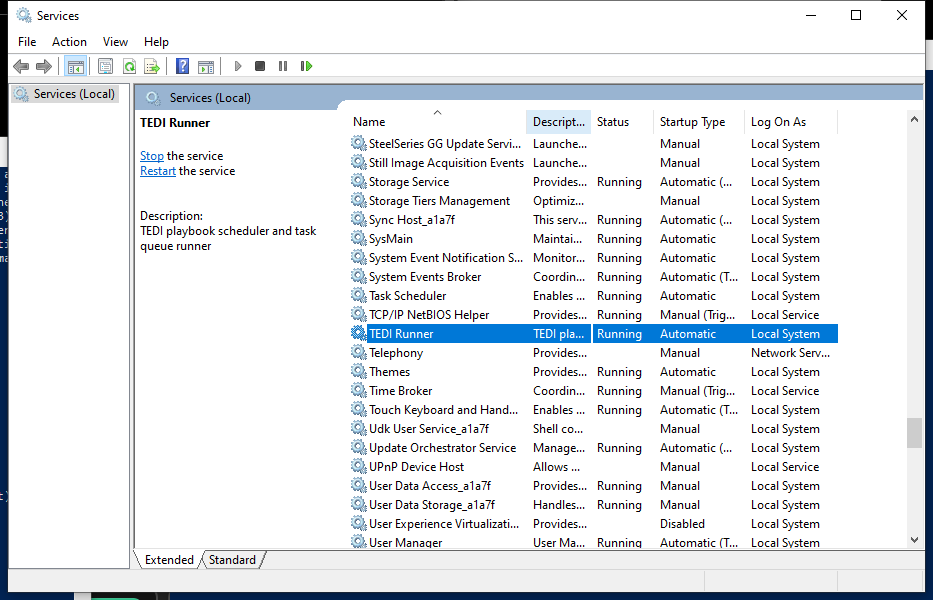
- Windows Service (TEDI / TEDI Runner) — Owns schedule polling and the background task queue. This is what keeps scheduled automations running on a timer.
Closing or minimizing the desktop app does not stop scheduled automations. Only stopping the TEDI Windows Service stops that background work. By default, closing the window minimizes TEDI to the system tray; the service keeps running either way.
Before you begin
- Windows 10 or 11 (64-bit) on the Vista workstation that will run automations.
- Viewpoint Vista client already installed and usable on that machine (TEDI drives the real Vista UI).
- Prerequisites (the TEDI installer typically prompts for missing ones):
- .NET Framework 4.8
- Microsoft ODBC Driver 17 or 18 for SQL Server (x64)
- A TEDI license key (format
TEDI-XXXX-XXXX-XXXX-XXXX) from your purchase or TUDS licensing. - SQL Server access to the Vista database so TEDI can refresh its local metadata catalog.
Install TEDI
- Run the TEDI setup EXE on the Windows machine that should run automations.
- Complete the installer prompts, including the registration dialog where you enter your TEDI license key.
- Allow the installer to create the local Python runner under
C:\ProgramData\TEDI\python\and register the TEDI Windows Service. - Confirm the service is running (Services.msc → look for TEDI / TEDI Runner).
- Launch Start Menu → TEDI (TEDI.exe).
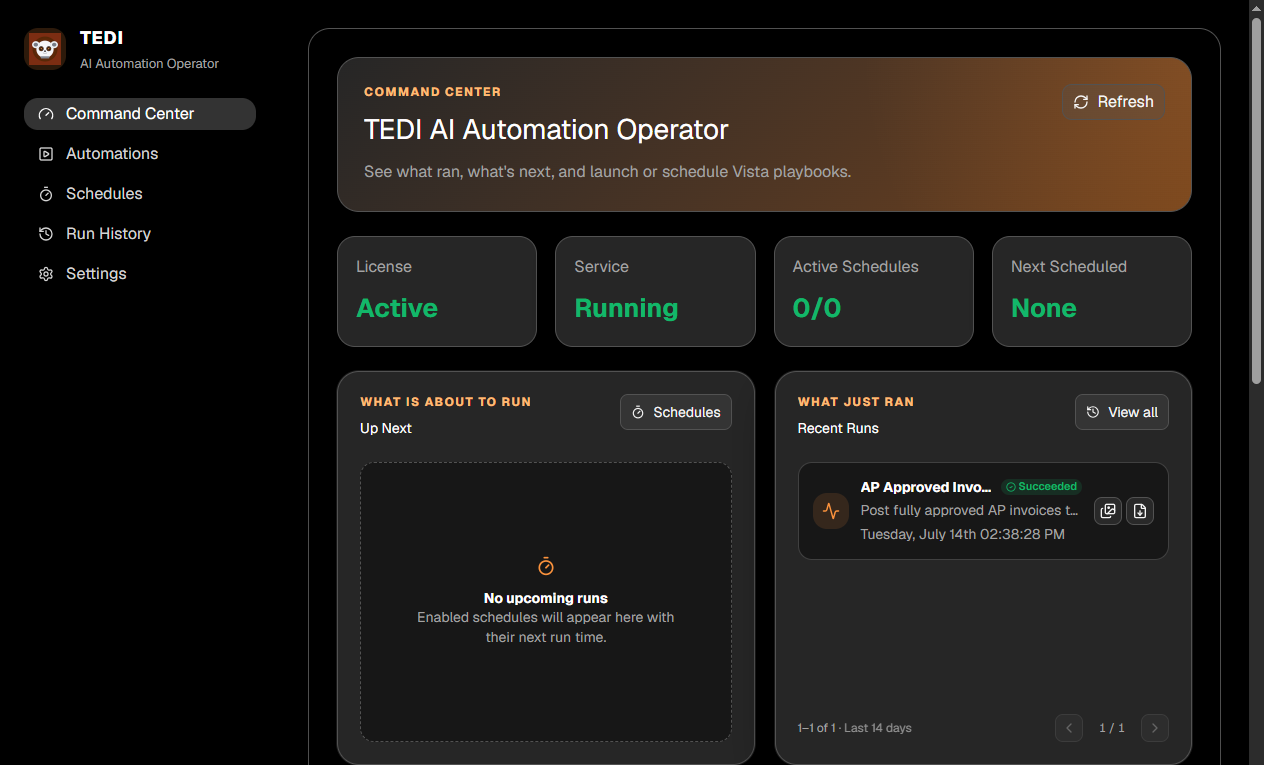
Expected outcome: TEDI opens to Command Center, and the Windows Service is Running.
Confirm you are ready on Command Center
- Open Command Center (home screen).
- Check the License metric (should show Active after setup; see below for activation details).
- Note Active Schedules, Active Runs, and Next Scheduled — these fill in as you create work.
If the desktop cannot reach the local API, you may see an API probe failed message. Confirm the app finished starting, then retry. For schedule problems later, always verify the Windows Service is Running.
Activating your TEDI license
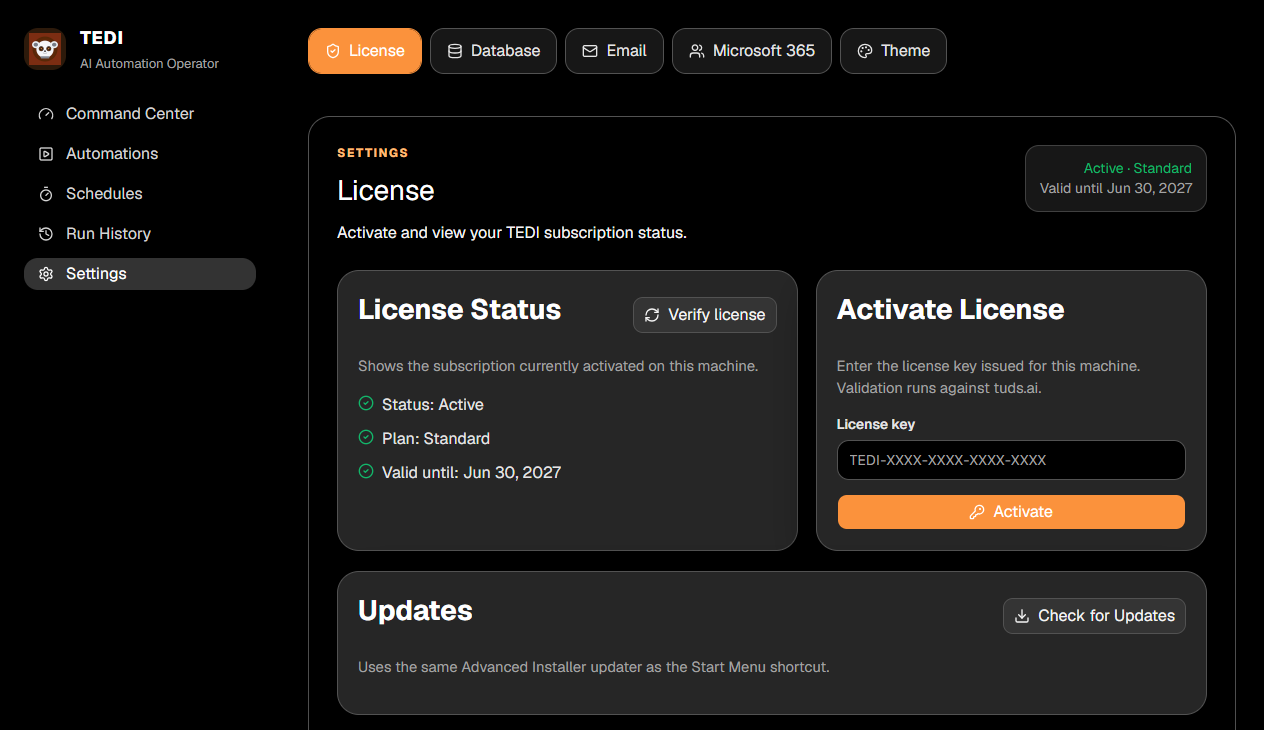
- Open Settings → License from the left sidebar.
- Paste your license key (format
TEDI-XXXX-XXXX-XXXX-XXXX) into the license key field. - Click Activate. The license metric on Command Center should change to Active.
How licensing works: TEDI validates its license by contacting tuds.ai periodically. If your license becomes inactivated, TEDI will automatically disable all schedules until the license is reactivated. You can retrieve or manage your license key from your TUDS account (if you have one), or find the key in your original purchase confirmation email.
Note: TEDI operates fully standalone — you do not need a TUDS account installed or running for TEDI to function. The TUDS account is only needed for license retrieval, license management, and accessing the knowledge base articles.
Learn the main areas
Use the left sidebar to move between TEDI’s main screens:
- Command Center — License health, recent runs, next scheduled runs, and a snapshot of the automation library.
- Automations — Browse approved playbooks, open a launch form, and queue a run. Automations are pre-built step sequences that drive Vista for you — for example, auto-posting AP batches, refreshing monthly closes, or processing data from folders.
- Recent Runs — Step progress, failures, retries, and proof packs.
- Schedules — Recurring rules and saved launch parameters for unattended runs.
- Settings — License, Database (Vista SQL catalog), Teams, Outlook, and Theme.
The Command Center screenshot above already shows the left sidebar. You do not need a separate sidebar-only image — use that same screen to orient on Command Center, Automations, Recent Runs, Schedules, and Settings.
Where TEDI stores data
On a normal install, TEDI uses:
C:\ProgramData\TEDI\data\— SQLite stores for runs, schedules, and license cache.C:\ProgramData\TEDI\artifacts\— Run evidence and runner logs (including runner-runtime.log).C:\ProgramData\TEDI\cache\— Local Vista catalog cache after SQL refresh.C:\ProgramData\TEDI\python\— Installed runner virtualenv used by the service and desktop.C:\Program Files\TEDI\— Desktop app, service host, and support files.
Lock down C:\ProgramData\TEDI so only administrators and accounts that need to operate TEDI can access it.
Window close behavior
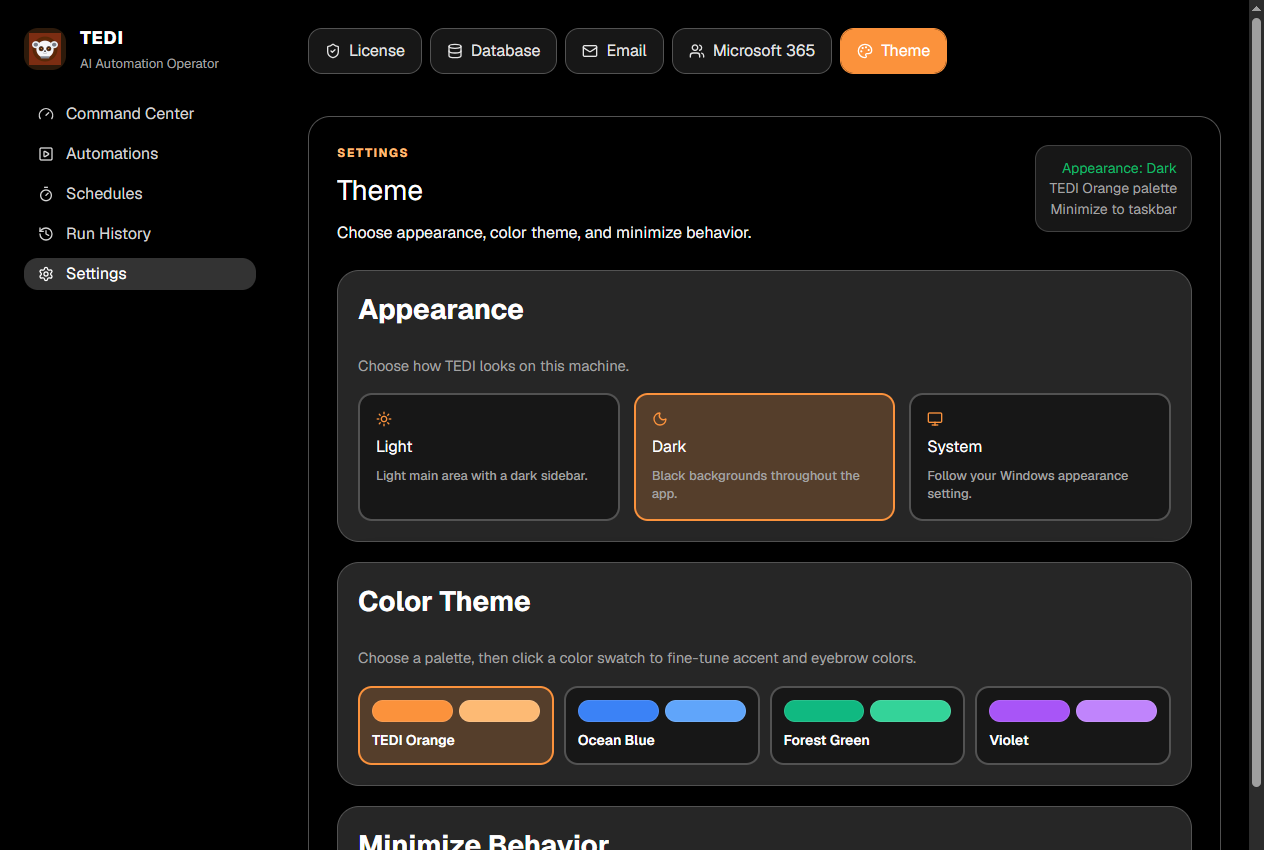
In Settings → Theme, you can choose what happens when you close the TEDI window:
- Minimize to tray (default) — Hides the window; TEDI stays in the system tray for quick reopen.
- Close — Exits the desktop app. The Windows Service still keeps running schedules.
Tray tooltip: TEDI - automation running in background. Use tray Open TEDI (or double-click the icon) to reopen; use Quit only when you intend to exit the desktop app.
First-success path (recommended order)
- Complete TEDI Initial Setup (license + Vista SQL catalog refresh).
- Run a TEDI Automation once manually and watch it in Recent Runs.
- Schedule that automation with a near-term rule and confirm it appears under Next scheduled runs.
- Learn run results and proof packs so you can recover from Failed or Blocked steps.
Use the related TEDI articles for each of those steps.
Common mistakes
- Thinking the desktop app is the scheduler — Scheduled runs belong to the Windows Service.
- No license activated — Scheduling and automation stay locked until the key is active in Settings → License.
- Catalog not refreshed — Playbooks need Settings → Database → Refresh catalog from SQL Server before Vista forms resolve reliably.
- Running automations without Vista ready — The Vista client must be available on this machine for UI-driven steps.
Next steps
- TEDI Initial Setup — Activate license and connect Vista SQL Server.
- Running a TEDI Automation — Queue your first playbook.
- Scheduling TEDI Automations — Unattended timing rules.
- Monitoring and Troubleshooting TEDI — When something fails.